To add a feature-rich chat room to your BuddyPress, please refer to the following instructions.
Firstly, please download BuddyPress chat module, and uncompress the package.

Installation Level: Intermediate
Installation Time: ~5 Minutes
Then, copy: folder buddypress_mod_for_123flashchat/
To: <wordpress root directory>/wp-content/plugins/buddypress_mod_for_123flashchat
Secondly, activate the chat module.
Please login WordPress Admin Panel-> Plugins
Click "Activate" button.

Thirdly, add 123flashchat to sidebar.
Please login WordPress Admin Panel-> Appearance -> Widgets
Move Chat Sider to the Main Sidebar and save it.

Fourthly, configure module
Please login WordPress Admin Panel-> 123FlashChat-> Chat Settings
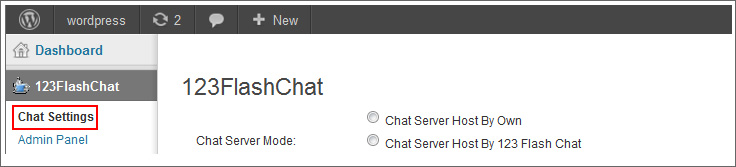
1. Chat Server Mode
If you choose Chat Server Host By Your Own, please set Auth-URL by the instructions that mentions from the fifth step.

If you choose Chat Server Host By 123 Flash Chat, not only you need to set Auth-URL by the instructions that mentions from the fifth step, but also write your Chat Client Location.

Or you choose Chat server Host By 123 Flash Chat For Free, please fill in your chat room name. (If you leave room name as blank, the default room name's value will be your domain's name.)

2. The following data of the chat room can display on WordPress index page to attract more users to join chatting.
Total rooms, total connections, online users
Chat room list
Online user list
The 2 types of data can be individually disabled to display if you need. And there is no show room list option in the free hosted mode.

3. Various chat clients and different open modes
You need to choose a chat client according to your need, as following:
Standard Chat (standard, with full features),
Html Chat (simple and neat)
Avatar Chat (with walking cartoon figures).

4. Change size, language and skin
You can change chat window size, language and a proper skin to match your website.


5. Live show and profile Setting
Optional live show is available for paid users, and you can set the live show chat skin and the room whose chat content will be displayed in the home page.
BuddyPress profile can be integrated to the chat.

Fifthly, integrate your chat with BuddyPress user database.
1. WordPress Admin Panel-> 123FlashChat-> Admin Panel, log in the chat Admin Panel ->System Settings-> Integrate Panel.
2. Server Settings-> Integration-> DataBase-> SELECT: URL-> edit.
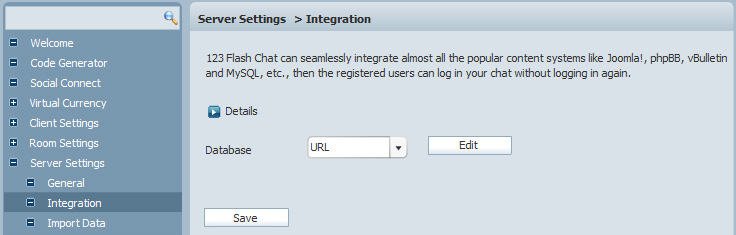
3. Change URL
http://<wordpress install directory>/modules/?r=123_flash_chat/login&username=%username%&password=%password%
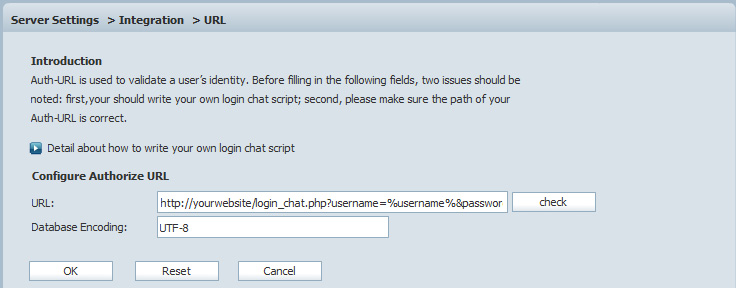
4. Press OK to save your setting.
5. Restart chat server at System Management -> Restart
The following image describes how auth-URL integration works.
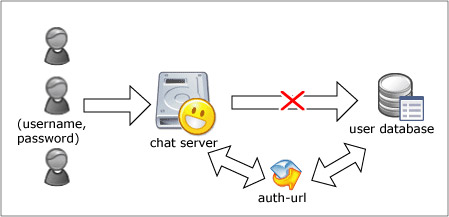
The Auth-URL application will perform as the communicating medium of the chat server and the database, i.e.: in fact, when a user logs on a chat server, the server won't connect to the user database directly, instead, it will send the username and password to the Auth- URL. Then the Auth- URL requests the database to authenticate the user. Finally, the Auth- URL will return the feedback to the chat server in a predefined way, whether approved or declined.
Integration done, enjoy your chat,
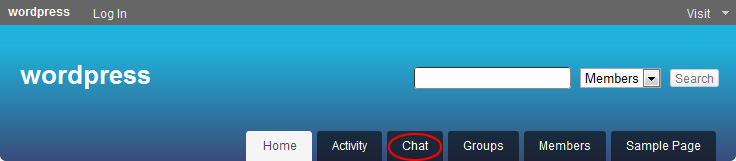
if you have any questions about chat room, please visit http://www.123flashchat.gr/faq.html.
You can also send email to support@123flashchat.gr, we offer free integration service for license buyer and yearly hosting buyer. |





